
Configuring the global settings
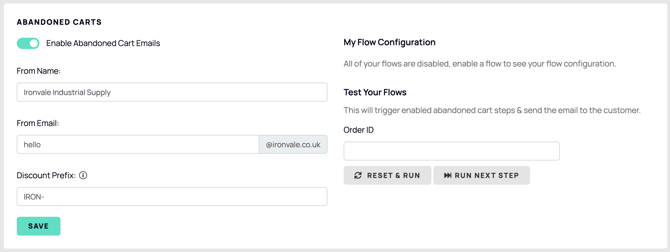
Before creating the email sequence, configure the global abandoned cart settings.1. Open the Email Marketing Plugin
2. Navigate to Abandoned Carts.
3. If you intend to use discounts, enter a prefix for automatically generated discount codes.
4. Enable the abandoned cart automation.
5. Save your changes.
For example, a shop called Ironvale might use IRON- so that every generated code begins with that prefix.
Creating the email flows
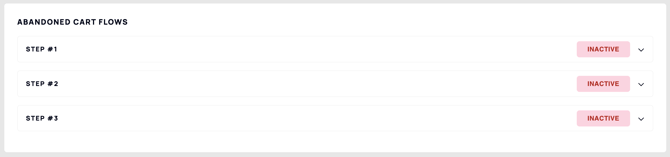
You can enable up to three email steps. For each active step, configure:- A subject line
- A completed email design
- A sending delay
- An optional discount
Although three steps are available, two may be enough for many businesses. Consider the type of product you sell and how long customers normally take to make a decision.
Configuring an email step
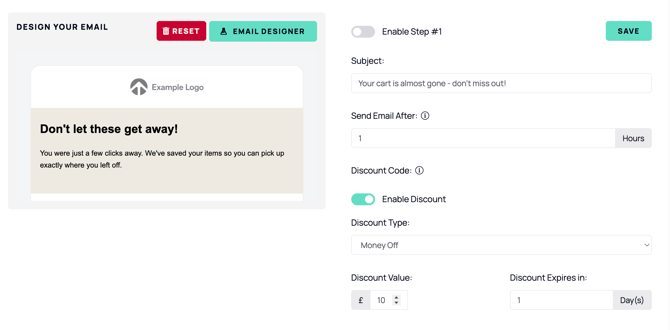
To configure each step:
1. Open the step you want to use.
2. Enable the step.
3. Enter the subject line.
4. Set the sending delay.
5. Open the email designer and complete the email design.
6. Add a discount if required.
7. Save the step.
Example timing could be:
- First email: one hour after the cart is abandoned
- Second email: 24 hours after the cart is abandoned
- Optional third email: 48 hours after the cart is abandoned
Adjust the delays to suit your products and customer buying cycle.
Adding the basket block
Every abandoned cart email must include the basket block in its design. The block displays the customer's abandoned items and gives them a route back to their basket.1. Open the email design for the step.
2. Add the Basket block.
3. Position and style the block within the email.
4. Customise the button label if required.
5. Save the design.
The basket block is essential. Without it, the email will not show the abandoned products or provide the intended route back to the basket.
Adding a discount
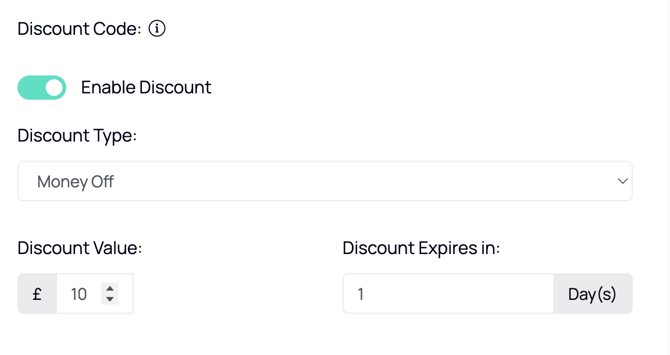
Discounts can be enabled independently for each email step.
To add a discount:
1. Open the required email step.
2. Enable the discount option.
3. Choose the discount type.
4. Enter the discount value.
5. Set the expiry period.
6. Make sure the Discount placeholder is included in your email design.
7. Save the step.
The plugin generates a unique code for each customer, so you do not need to manage the codes manually.
A common sequence is:
- Step one: a reminder without a discount
- Step two: a limited-time discount if the cart is still abandoned
- Step three, if used: a final reminder
For more information about discount configuration, refer to the Fortis articles.
Reviewing performance
The overall Abandoned Carts area reports:
- Emails sent
- Opens
- Clicks
- Unsubscribes
- Click-through rate
- Recovered orders
- Recovered revenue
- Conversion rate
Each step also tracks its own performance, allowing you to compare the emails in the sequence.
Tips
- Start with a simple two-email sequence and review its performance.
- Set delays that reflect the normal buying cycle for your products.
- Include the basket block in every active step.
- Use a clear discount code prefix if you enable discounts.
- Consider sending a reminder before offering an incentive.
- Review step-level analytics to see which message drives recovery.